In case you need to edit it
If you’ve opened a document in Word but you can’t edit it, it’s probably locked for editing by someone or by a feature. Learning how to remove read only from Word should help you edit these documents even though they’ve been marked as read-only and aren’t supposed to be edited.
There are various reasons as to why people restrict their documents from being edited. Maybe you yourself made the document read-only but you forgot it, or maybe someone has it locked to ensure no unauthorized users can modify the contents of it.
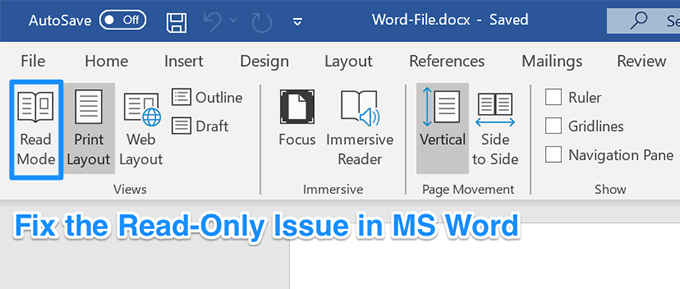
Regardless, if you’ve come across a document that you must edit but it’s in read-only mode, there are various methods to fix it and to be able to edit the document.
Also, be sure to check out our YouTube channel where we made a short video going over the fixes listed in this article.
Remove Read Only From Word By Disabling Edit Restrictions
We’ll start off by disabling the Word’s built-in feature that lets users restrict their documents from being modified. If you or someone has enabled this option for your current document, it is why you can’t edit it.
Disabling the option should fix it for you.
- Open your read-only document in the MS Word program.
- When it opens, find the tab that says Developer at the top and click on it.
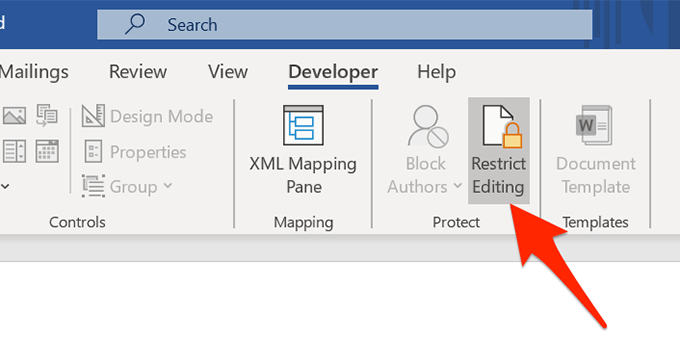
- You’ll find several options to choose from on the following screen. Look towards to the Protect area at the top and click on the option that says Restrict Editing.
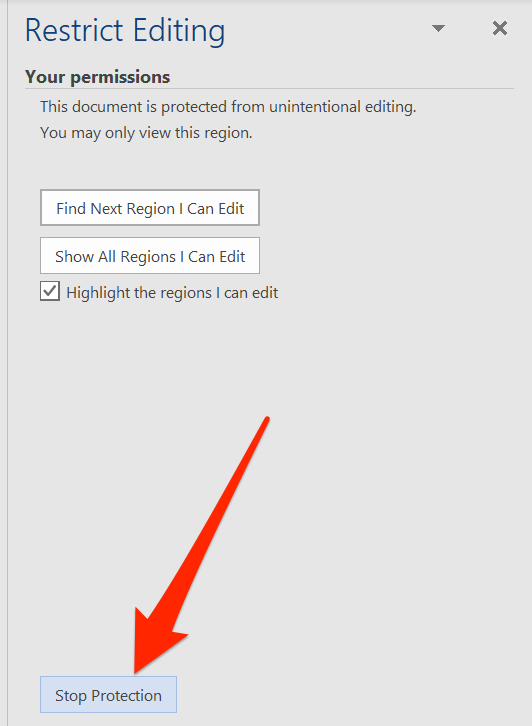
- A new pane will appear on the right-hand side. There’s a button at the bottom of this pane saying Stop Protection. Click on the button to remove read only from this Word document.
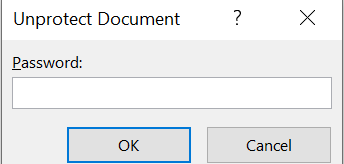
- If there was a password setup to restrict editing, you’ll need to enter it on the box shown on your screen. Then click on OK to unlock the document.
Your document is no longer in read-only mode and you can actually modify its contents as you wish.
Turn Off The Trust Center Options To Remove Word Opening In Read Only
Trust Center is a feature in Word that blocks certain documents from being fully opened with editing capabilities on your computer. You can disable the feature in the program and that should fix the read only issue you’re facing with your document.
- Launch the MS Word program on your machine.
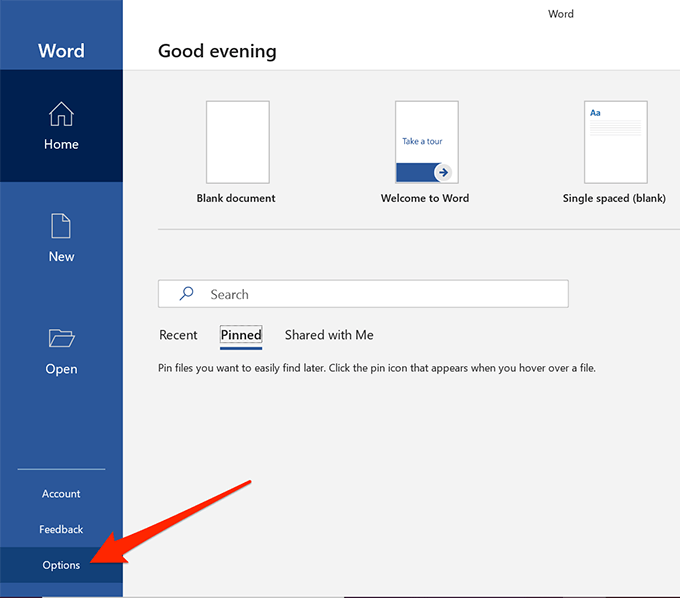
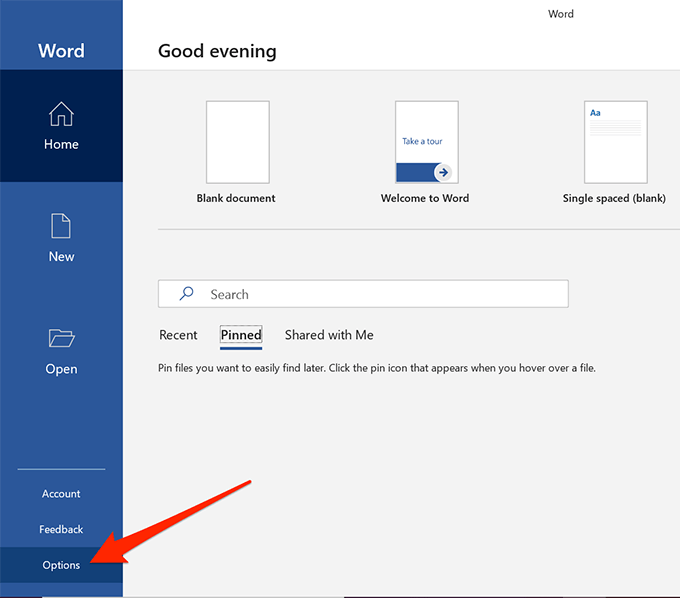
- At the bottom-left corner of your screen, you’ll find an option that says Options. Click on it to open the standard Word settings menu.
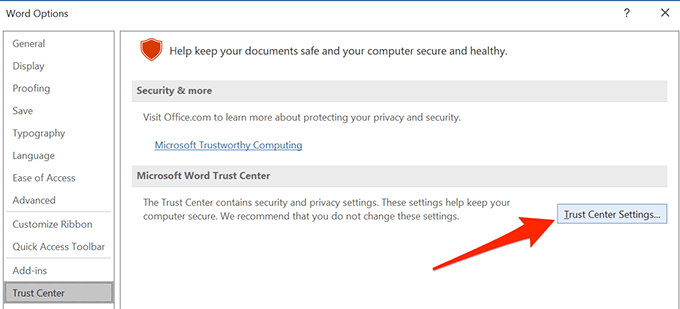
- On the following screen, you’ll find an entry saying Trust Center in the left sidebar. Click on it to open the Trust Center settings.
- You’ll see a button saying Trust Center Settings on the right-hand side pane. Click on it to open the settings menu.
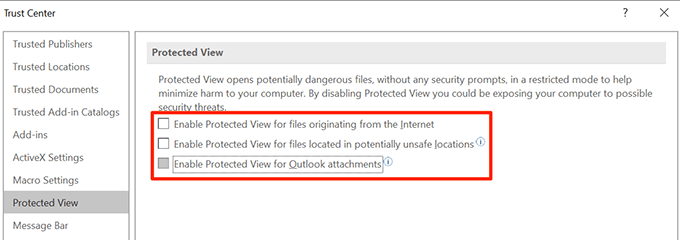
- There’ll be several options in the left sidebar of your screen. Find and select the one that says Protected View.
- On the right-hand side pane, you’ll see three checkboxes that are enabled. Untick each of these boxes to prevent Word from opening your documents in the protected view. Then click on OK at the bottom to save your changes.
- Launch your document in the program and you should be able to edit it.
Fix The Word Opening In Read Only For Email Attachments
MS Word actually has a number of features to protect you from various threats that are spread via Word files. One of these features opens your email attachments in the read-only mode so it can’t affect your computer negatively.
This may be the reason why your documents always open in the read-only mode. Turning this option off should fix the issue for you.
- Open MS Word on your computer.
- Click on the Options option at the lower-left corner and it’ll open the settings menu.
- Click on the General tab in the left sidebar if you aren’t already there. Then on the right-hand side menu, scroll down and find the option that says Open e-mail attachments and other uneditable files in reading view.
Untick the box for the option and click on OK to save the changes.
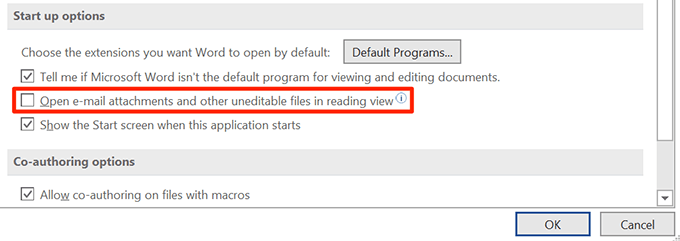
The Word files you’ve received as email attachments should now open in regular mode letting you edit them however you want.
Disable The Preview Pane In File Explorer
Preview pane in Explorer shows the previews of your files, and for it to do that, it sometimes locks-up your files and prevents you from editing them.
A quick solution to that is to simply turn off the pane.
- Open This PC from your desktop.
- Click on the View tab at the very top of your screen.
- Select the option that says Preview pane in the Panes section. It’ll disable the pane if it was enabled before.
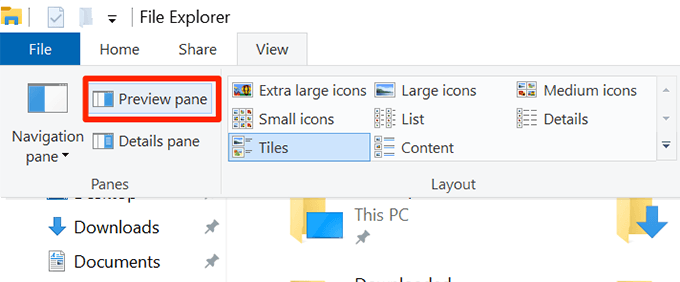
You may now try opening your file in the program to see if it fixed the issue.
Toggle An Option In The Properties To Remove Read Only From Word
One of the possible ways to fix read only mode in Word is to change an attribute for your file.
- Right-click on your Word document and select Properties.
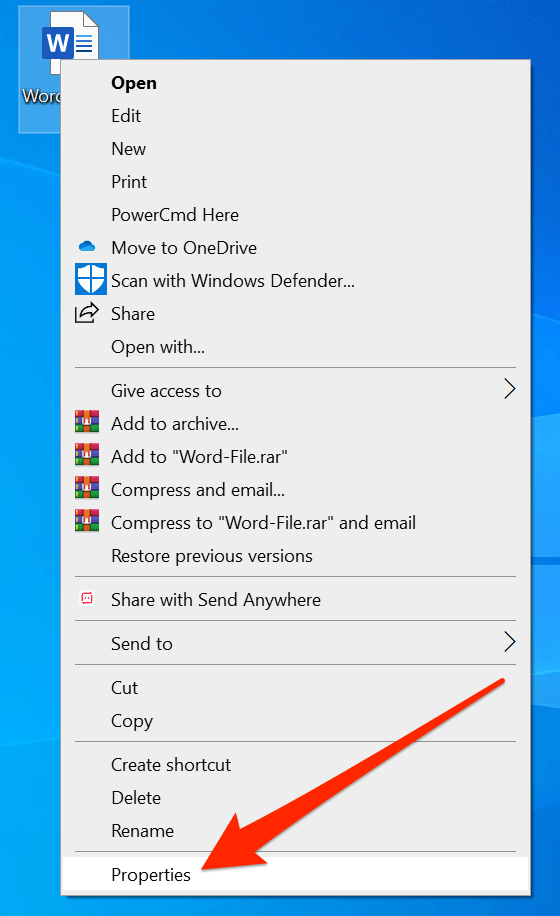
- Tick-mark Read-only and click on OK.
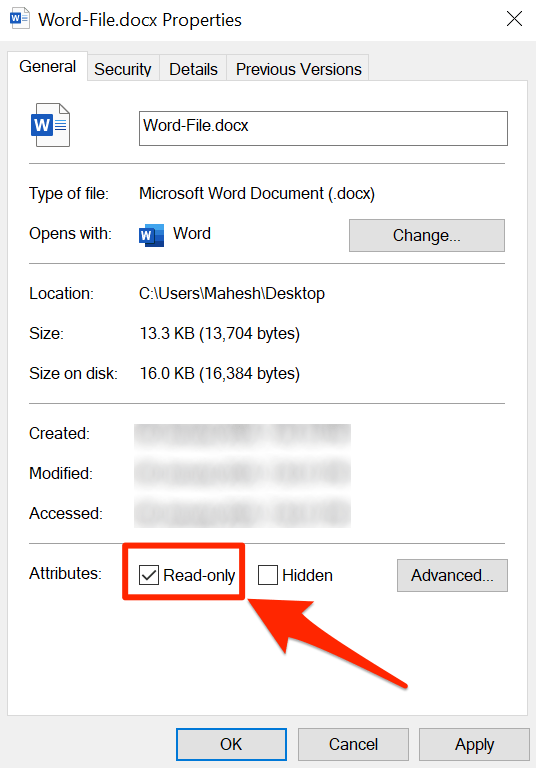
- Open the Properties menu again, untick the Read-only option, and hit OK.
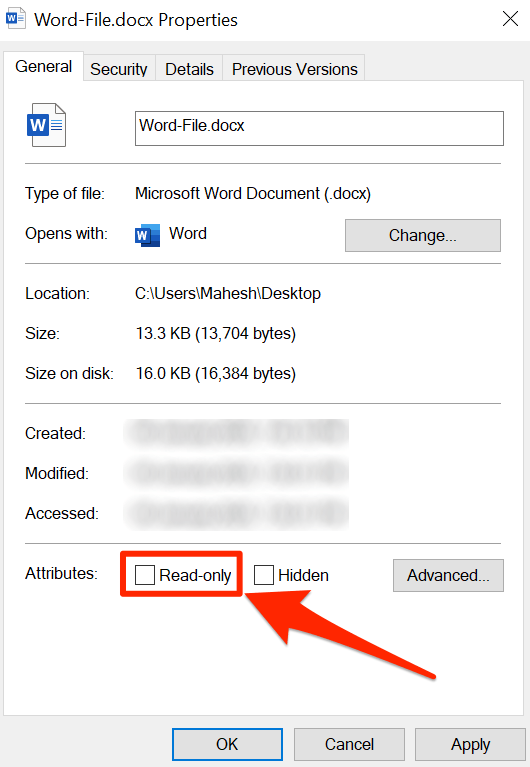
- Open the file in Word and it should let you edit it.
Extract The File Before Opening It In MS Word
If you’re trying to edit a Word file that’s inside an archived format such as RAR or ZIP, you’ll want to first extract the file from it to then edit it. Directly opening the file from an archive sometimes prevents you from editing it.
- Right-click on the archive and select Extract Here.
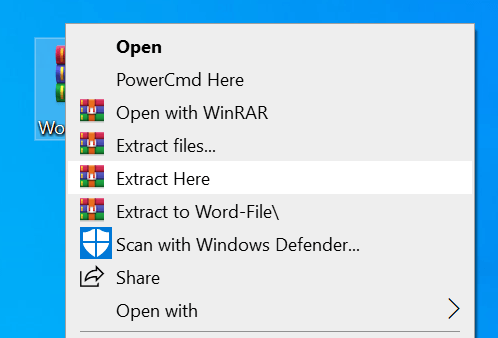
- Open the file in Word and you’ll be able to edit it.


