How to find out what is hogging all your CPU power; we go over Processes, Details and Services tabs
Ever had a program freeze on you that refuses to close or disappear? One annoying problem is when a poorly written application crashes and refuses to be shut down. Or maybe you’ve noticed that your computer is suddenly running very slow, but there’s no clear indication as to why? In that case, you might have a process running on your system that is hogging all of the CPU time or taking up loads of memory.
Well, the Windows Task Manager can help you out in some of these situations to determine the cause and to kill the problem application. First off, the purpose of the task manger is to provide computer performance information along with details about currently running programs, processes and services. It also provides the ability to monitor your network traffic if you are connected to a network.
Opening Task Manager
So let’s get started with learning about this very useful tool in Windows 10. You can get to the Task Manager in a few ways:
1. Press Ctrl + Shift + ESC while holding each key down. Just like you would do Ctrl + Alt + Delete, which I think most people have done by now.
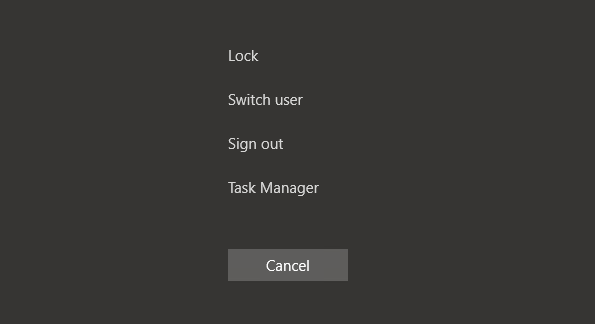
2. The other way is to press the second key combination mentioned above, Ctrl + Alt + Delete, and then clicking on the Task Manger link.
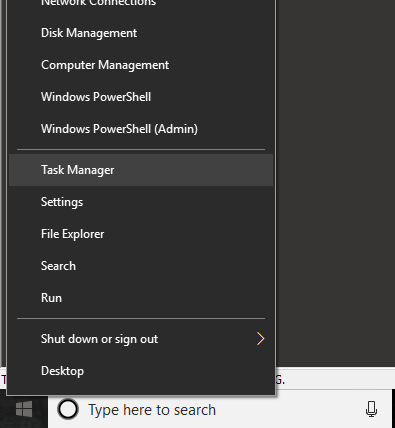
3. Press Windows Key + X or right-click on the Start button and you’ll get the power menu, which has a link to the task manager.
Task Manager Overiew
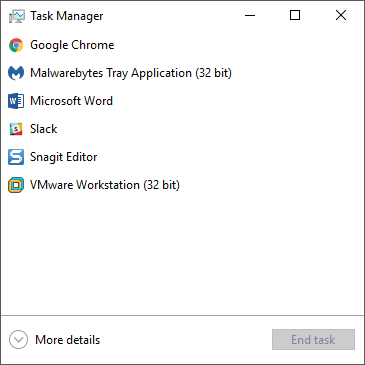
Now you should see the Task Manager dialog on your computer screen. By default, in Windows 10, you’ll see the slimmed down version, which just gives you a list of running applications.
To close a non-responsive program, simply click on it and click on End Task button. Since most people will really only use the task manager for this purpose, Microsoft decided to hide all of the extra details unless someone really wants to see it.
Since we want to see more than just the running apps on our computer, click on More details. This will bring up the task manager with all the tabs.
Processes, Details & Services Tabs
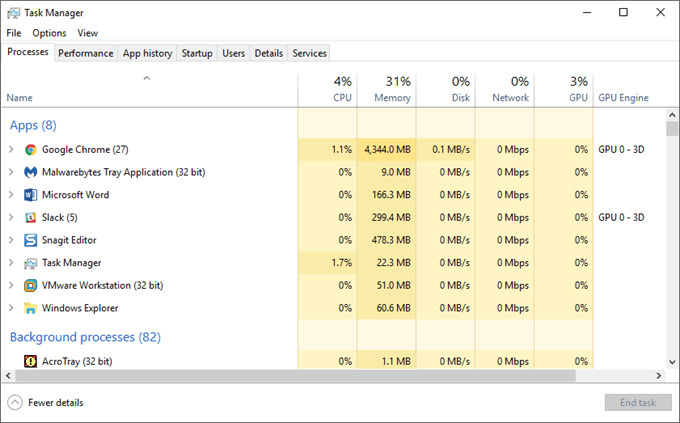
By default, the Processes tab will be shown. The list of processes is broken down into three main categories: Apps, Background processes and Windows processes. Apps will give you a list of all the currently running programs on your PC. These are the ones that show up on your taskbar or in the system tray.
Background processes are all Windows Store apps and third-party apps running on the system. Some of the processes here you might see running in the system tray. Most of the others are background processes that will sit idly until you open the program or when a scheduled task runs.
The Windows processes section consists of all the core processes that are needed for Windows 10 to run properly. It mostly consists of many Service Host (svchost.exe) processes. I’ve written previously about how svchost.exe can sometimes cause high CPU usage, but to solve the problem you have to know which Windows service is running inside that particular svchost.exe process.
You can use this tab to get detailed resource usage info for each process running on the system. It’s a quick way to diagnose a slow computer if one process is taking up 95% of your CPU, for example. Or if one program is causing your disk usage to up to 100%, you’ll be able to see it here.
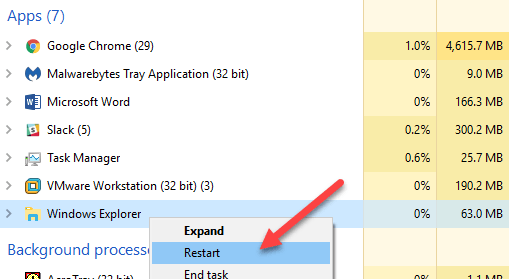
The Processes tab is also good for restarting Explorer. All you have to do is right-click on Windows Explorer and choose Restart. In previous versions of Windows, you had to kill the process and then run a new explorer.exe task, which was a pain.
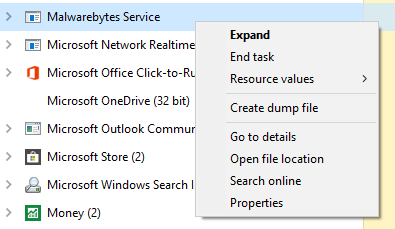
When you right-click on a process, you’ll get a list of actions you can perform on that process.
You can end the task, create a dump file, go to details, open the file location, search online or see the properties. End task will go ahead and kill the process. Create dump file is only used by developers and you’ll never need to worry about it. Go to details will take you to the Details tab, where you can see the process ID.
Under the Description heading, you’ll get more information about the company or program that is associated with that process. Another good option is the Search online link. If you’re not sure what a process does or where it came from, click Search online and it will perform a search for that EXE file along with the description. Open file location is useful if you want to know the location of the EXE file on your computer.
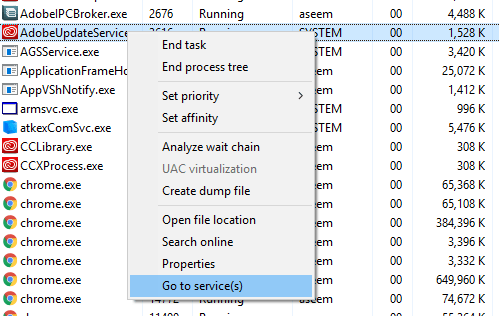
Finally, while on the Details tab, if you right-click on a process, you’ll also see an option to go to the services tab. Note that you can set the priority and set affinity for the process here. You should never really change these values for any process unless you know what you are doing.
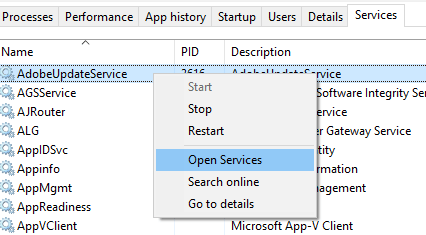
If the process has a service associated with it, it will bring you to the Services tab and highlight that particular service. However, not all processes have a service associated with them.
Here you can right-click to start or stop a service and you can also open the Services console from here. This screen will show you all services on the system and show you which ones are running and which ones are stopped.
Hopefully, that gave you a good overview of the Task Manager in Windows 10 and what it can be used for. In Part II, we’ll talk about the Performance and App History tabs. Enjoy!

