You never know who is watching or listening
Every web browser needs specific permissions enabled to allow the program to access your microphone and webcam. You can deny access to your mic and camera to prevent your browser from listening or watching you.
Each internet browser does this a little differently, but they all provide you with the necessary tools to stop websites from using your camera and/or mic. You just need to know where to look.
Once you’ve told your favorite browser to quit letting websites use your camera or mic, you’ll have to return to the settings described below to permit access, like if you want to record yourself with your webcam.
Otherwise, any website asking to use these devices will not be able to. You can finally keep your mic and webcam plugged in without worry that a website will start listening or watching you privately.
Chrome
Chrome has a global setting that, when enabled, forces you to give permission to each website that requests access to your mic or camera. If you do this, then the next time a website asks to use your camera or microphone, you can just deny it from the pop-up message.
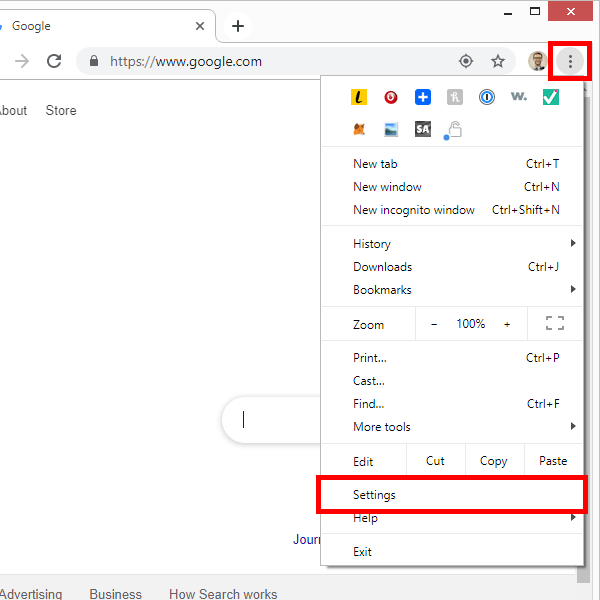
Step 1: Select the dotted menu button at the upper-right side of Chrome, and then choose Settings.
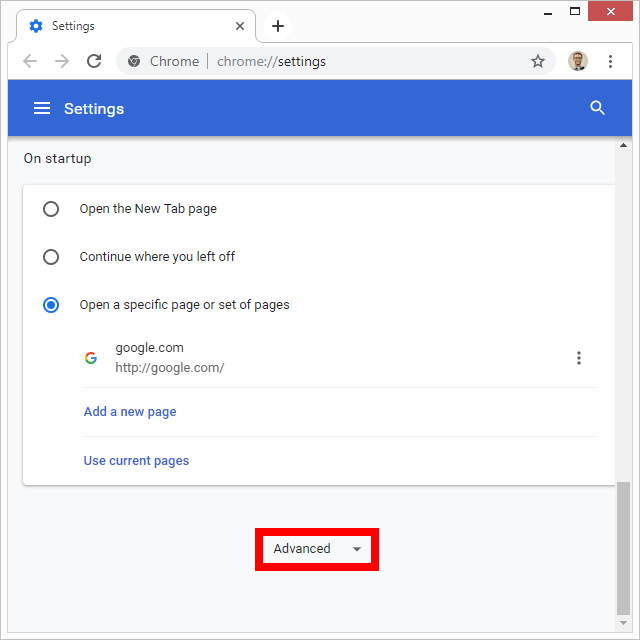
Step 2: Scroll to the bottom and select Advanced.
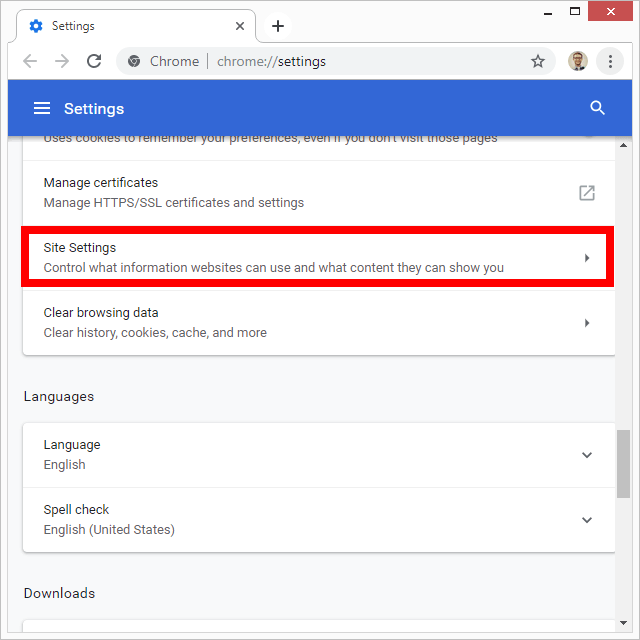
Step 3: Choose Site Settings.
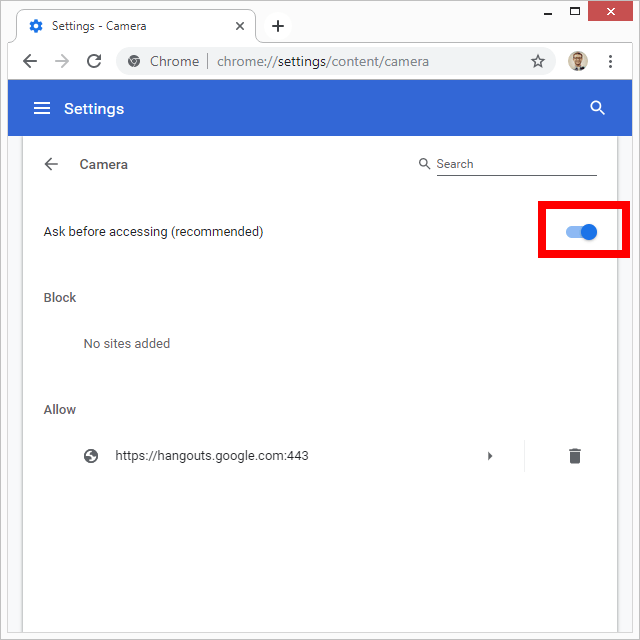
Step 4: Select Camera and press the button next to Ask before accessing to make sure Chrome requires your permission for camera access.
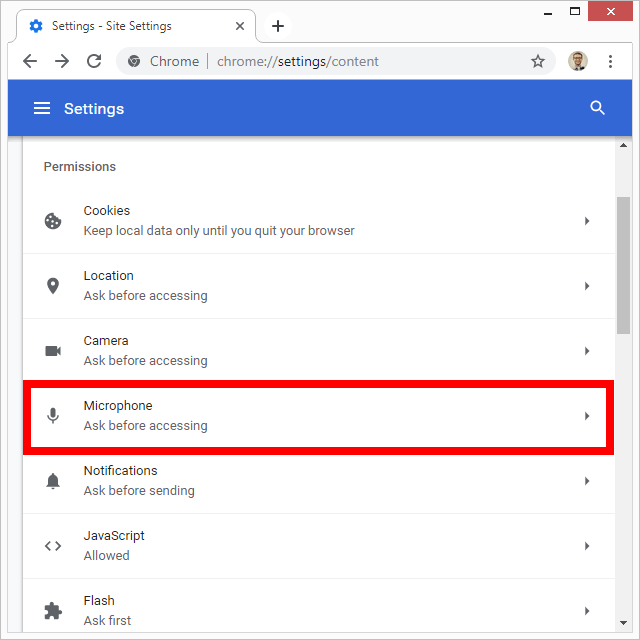
Step 5: Press the back arrow at the top left and then choose Microphone to enable the same setting there, too.
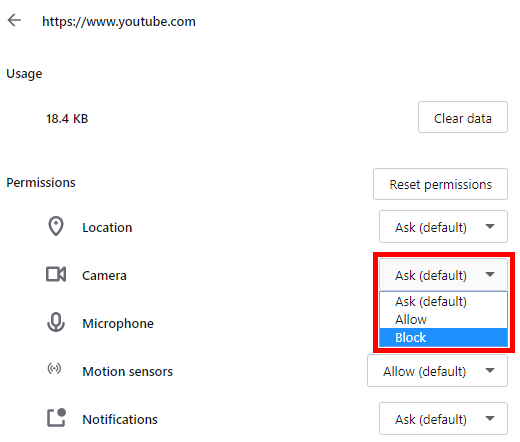
You can also block specific sites from using your mic and/or webcam. This is useful if you’ve already given access to the site once before but now you want to block it. Or, if you don’t ever want to be prompted to give the site permission to use your devices, you can follow these steps.
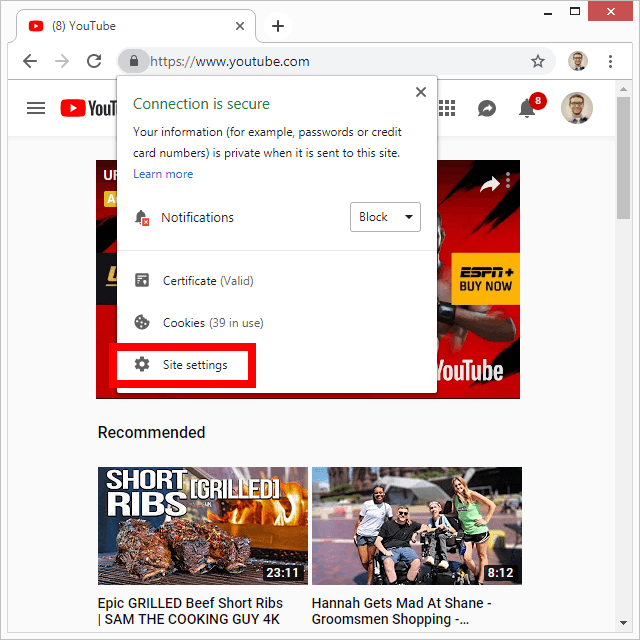
Step 1: Visit the site in question and select the lock icon from the left side of the URL.
Step 2: Select Site settings.
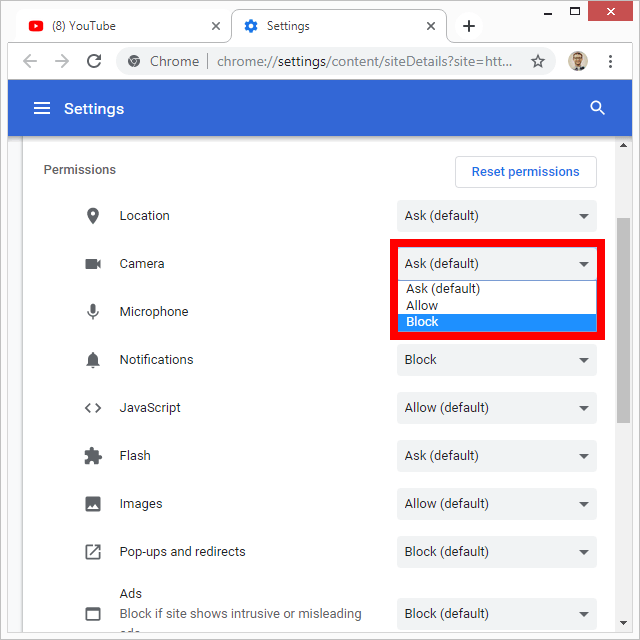
Step 3: Next to Camera and/or Microphone, select the menu and choose Block.
Firefox
The Firefox browser lets you prevent websites from accessing your camera and mic from the Privacy & Security area of the settings.
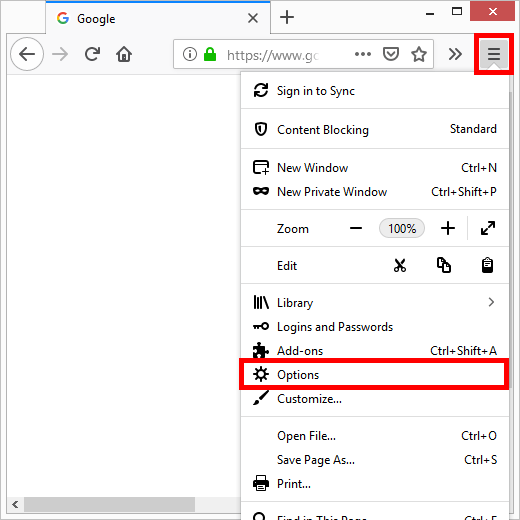
Step 1: Use the three-lined menu at the top right corner of Firefox to access Options.
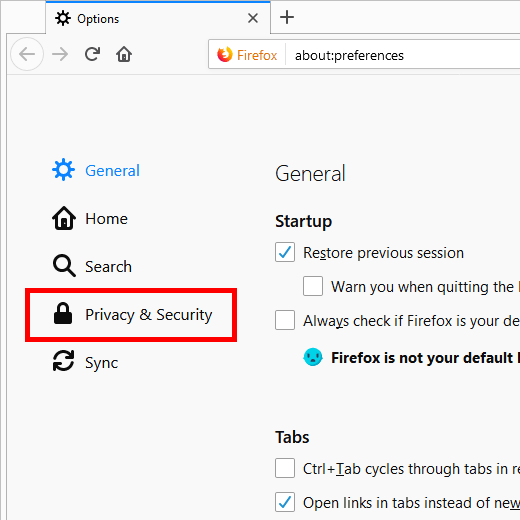
Step 2: Select Privacy & Security on the left side of the program.
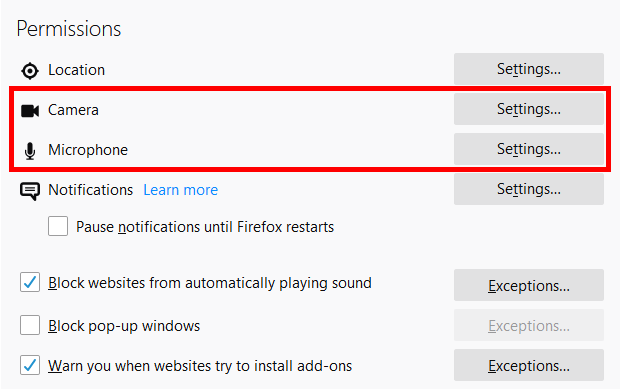
Step 3: Scroll to the Permissions area and choose Settings next to Camera and/or Microphone.
Step 4: Select Block new requests asking to access your camera (or microphone) from the bottom.
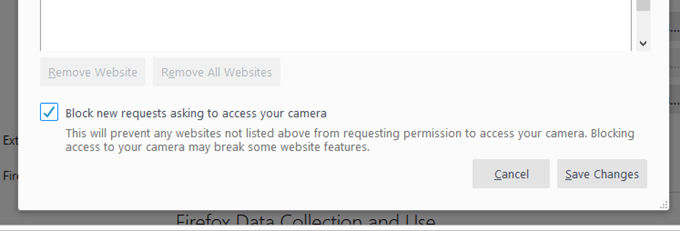
Step 5: Hit Save Changes.
If while on Step 3, you see a website already in the list, it means that you’ve already given that site permission to use your webcam and/or mic. Select the site and choose Remove Website to block it. If there are several there and you want none of them to use your webcam or mic, just hit the Remove All Websites button.
Opera
Opera works a lot like Chrome, so you can both block specific sites from using your camera/mic and force all sites to ask you first before they can hear or see you.
Here’s how to enable the global “ask” setting:
Step 1: Select Settings from the Opera menu.
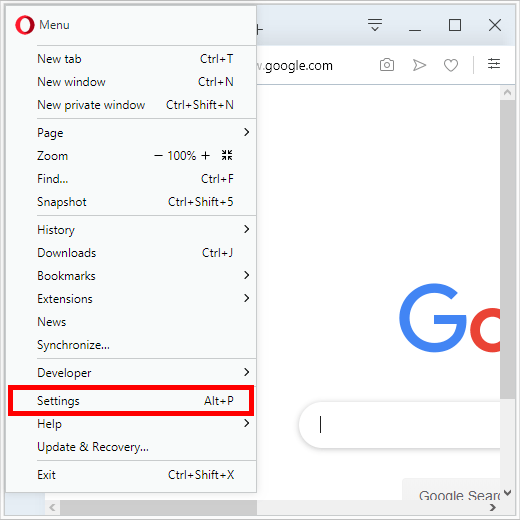
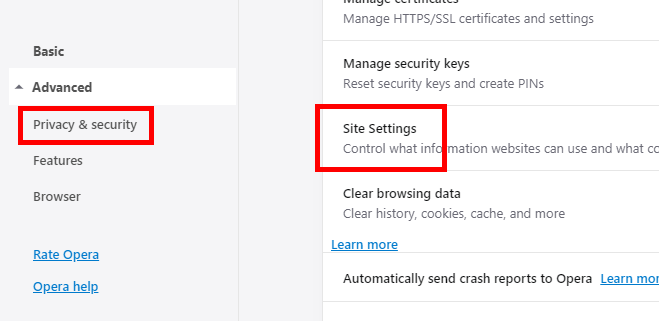
Step 2: Expand the Advanced item on the left and choose Privacy & Security below it.
Step 3: Choose Site Settings on the right.
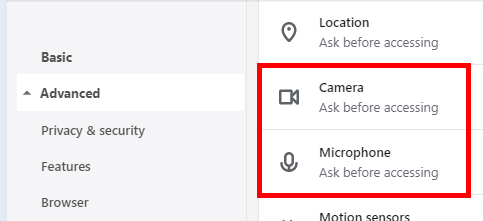
Step 4: Select Camera and/or Microphone.
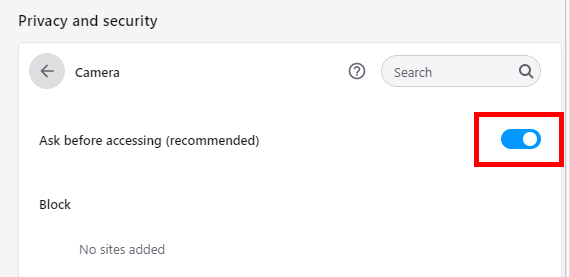
Step 5: Make sure the Ask before accessing item is enabled.
If you’re on a specific website and want to ensure that it can’t use your camera or mic, do this:
Step 1: Select the lock icon to the left of the URL at the top of Opera
Step 2: Choose Site settings.
Step 3: Select Block next to Camera and/or Microphone.
Safari
To block your camera or mic in Safari, access the Websites area of the browser’s settings.
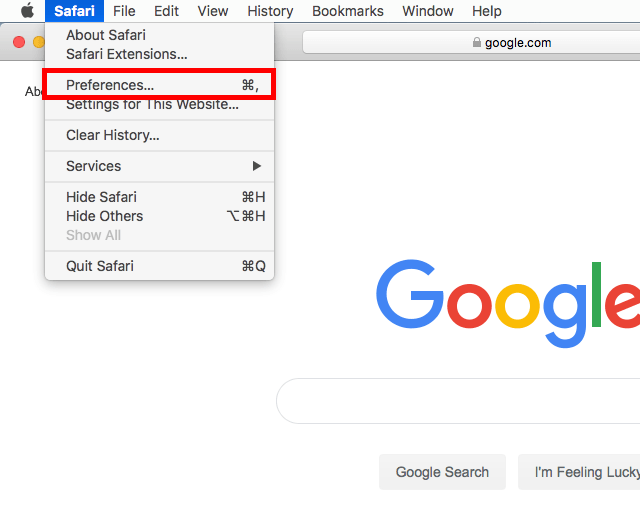
Step 1: Go to Safari > Preferences.
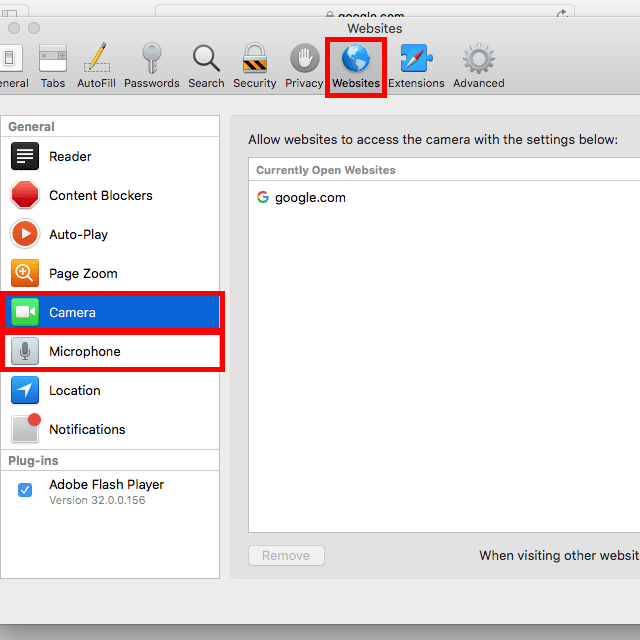
Step 2: Open the Websites tab at the top and then choose Camera or Microphone.
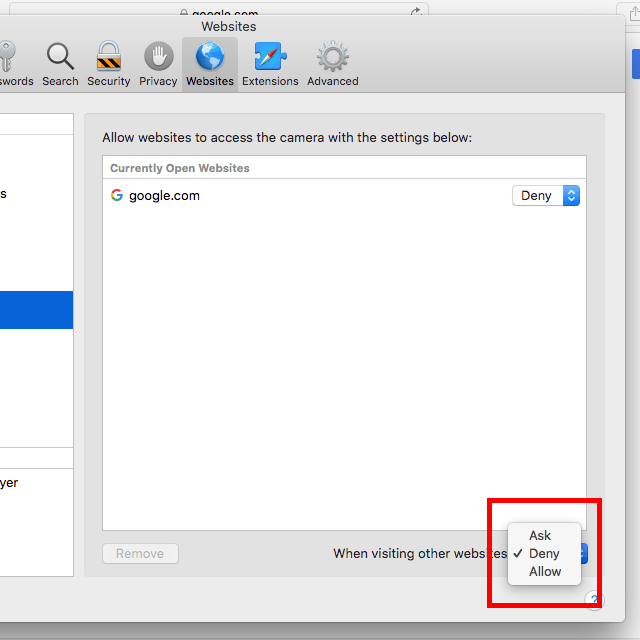
Step 4: Select the menu at the bottom and choose Deny. This prevents websites not listed in the above section from using your webcam or mic. If a website you want to control is currently open, you can control how just that one website can use your camera and microphone by using the menu next to the URL.
Edge
Camera and mic access is controlled for Microsoft Edge through Windows 10 Settings.
Tip: Learn how to use the Windows 10 Camera app.
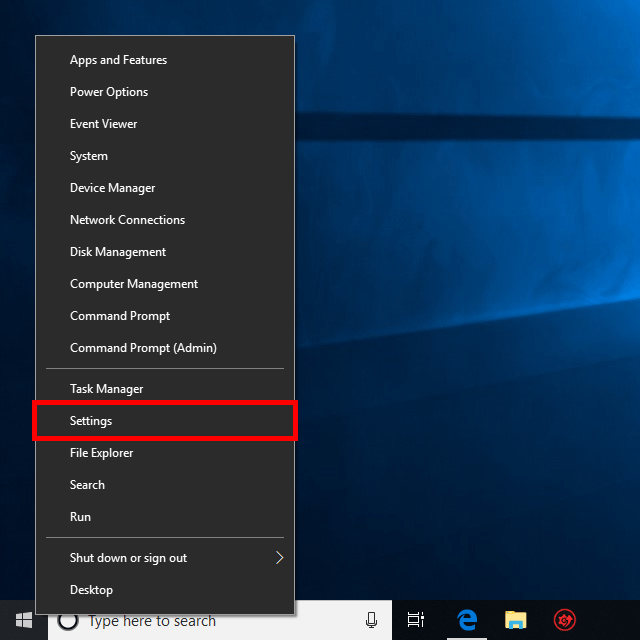
Step 1: Right-click or tap-and-hold the Start button, and choose Settings.
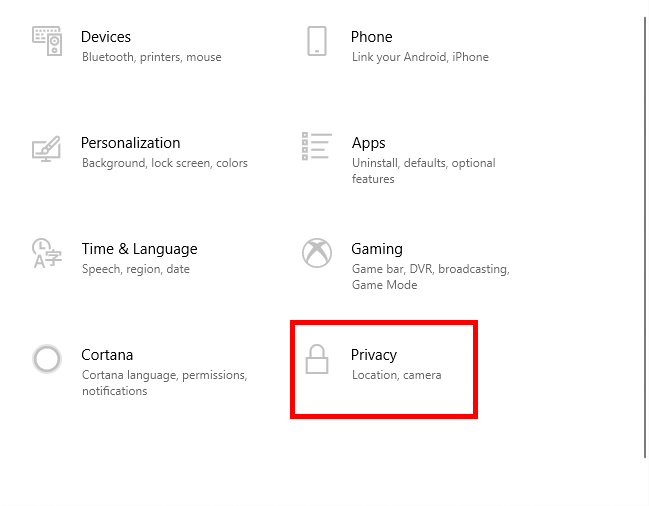
Step 2: Select Privacy.
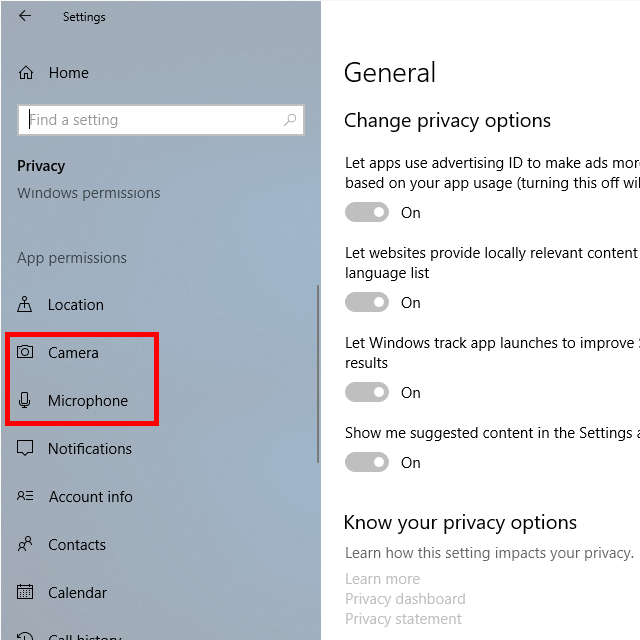
Step 3: Choose Camera or Microphone from the left pane.
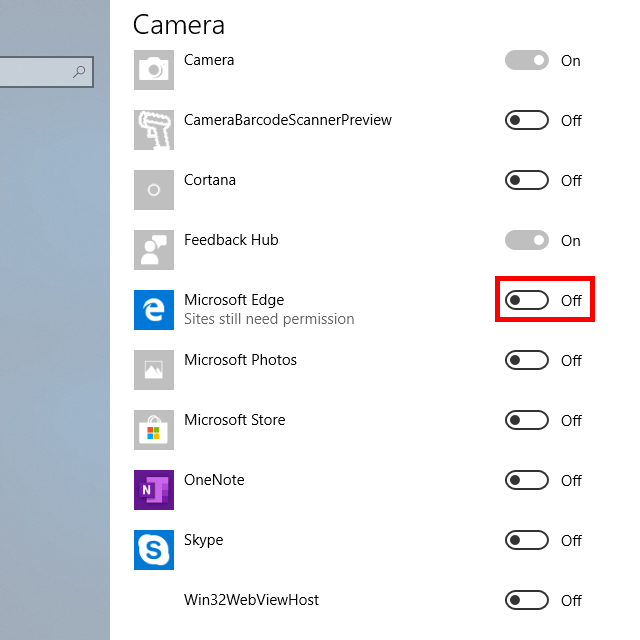
Step 4: Scroll down to Microsoft Edge and select the button next to it to change access to Off.
Internet Explorer
When a website requests access to your camera or mic in Internet Explorer, you have to select Deny to block it. However, you can also open the Flash Player Settings Manager to block all sites from using your camera and microphone.
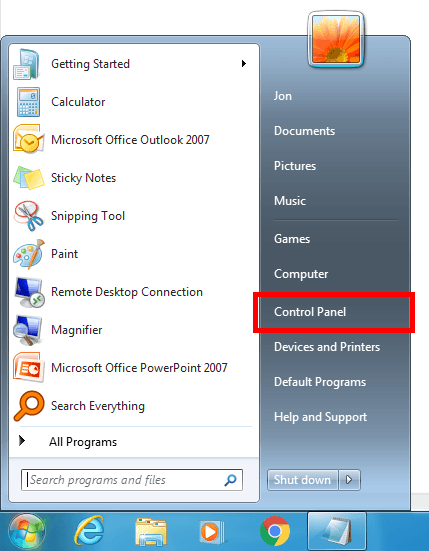
Step 1: Open Control Panel. You can do so from the Start menu or by executing the control command in the Run dialog box (WIN+R).
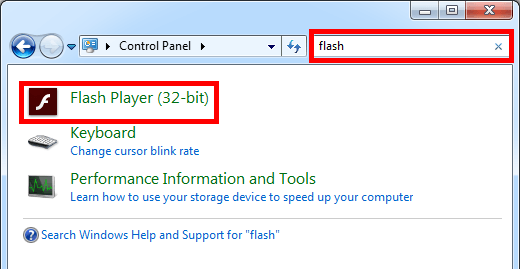
Step 2: Search Control Panel for flash, and open Flash Player when you see it in the list.
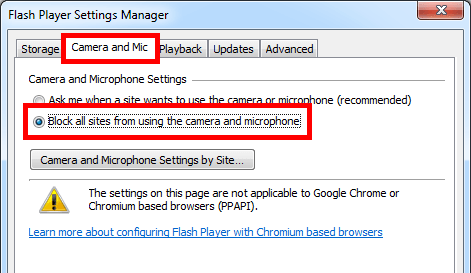
Step 3: Go into the Camera and Mic tab and select Block all sites from using the camera and microphone. To block specific sites from using your microphone or webcam, use the Camera and Microphone Settings by Site button to add URLs to the block list.
Yandex Browser
Disable your webcam and/or microphone in Yandex Browser with an extremely straightforward setting. Doing this will block all sites from using your mic and/or camera:
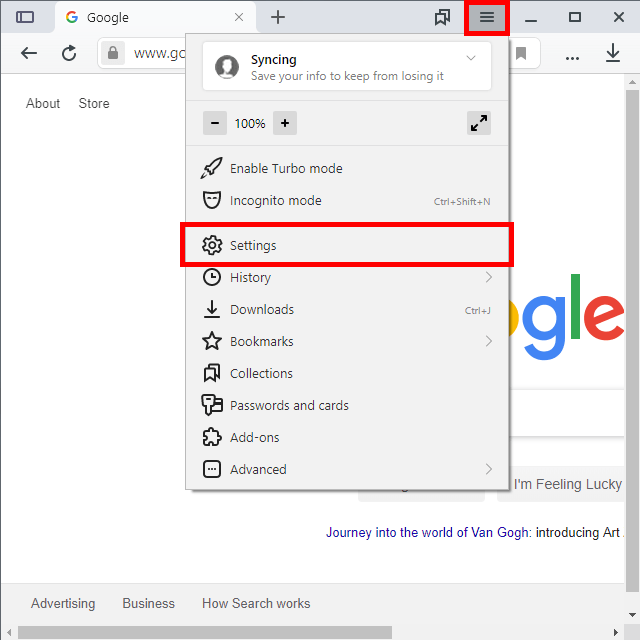
Step 1: Select the three-lined button at the top right of the browser, to the left of the minimize button, and choose Settings.
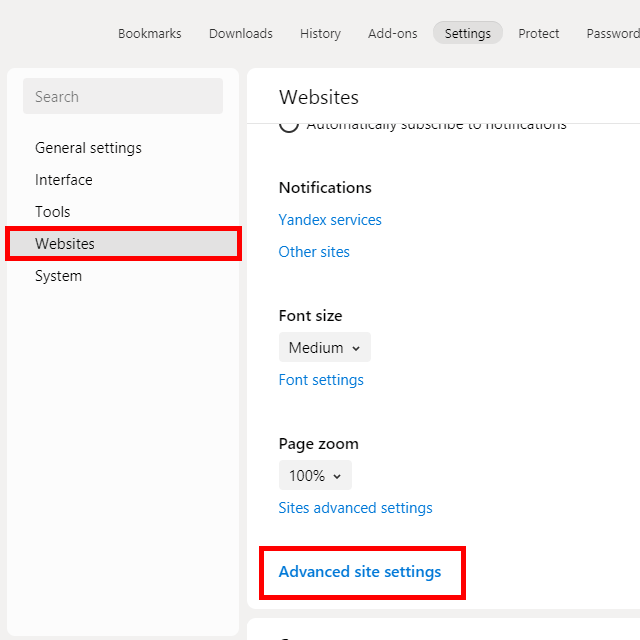
Step 2: Select Websites on the left, and then Advanced site settings from the right pane.
Step 3: Select Not allowed under Access to your camera and/or Access to your microphone.
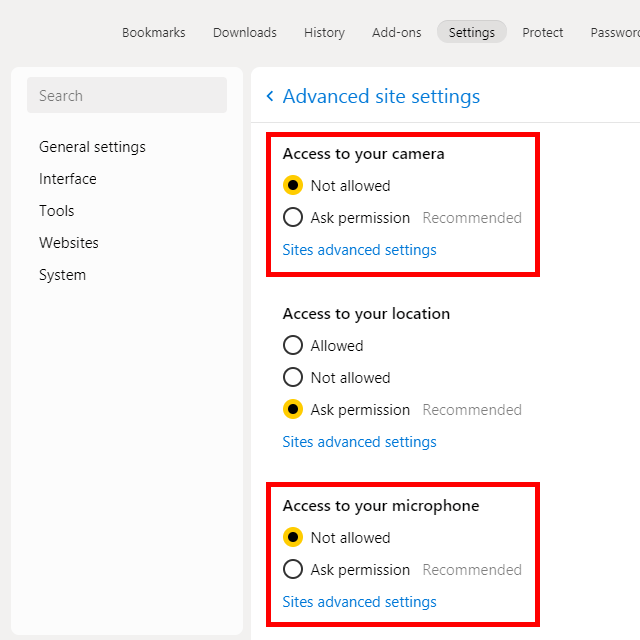
If you want to manage existing permissions for individual sites that you’ve already enabled access for, repeat these steps but instead of choosing the “Not allowed” option, select Sites advanced settings to choose which sites to quit allowing.


